I love ice cream. I eat it all year long. We live in western NY, and I believe our heater runs about 8 months out of the year and the AC perhaps a single week, but that doesn't stop my ice cream love affair. I eat it when there's four feet of snow outside my door and I'm shivering from the cold.
That's usually my downfall with eating low carb. There's a lovely little ice cream shack in the next town over, that serves fairly locally made ice cream (that's very good), and Chad and I frequent it at least once a week in the summer. Sometimes three times a week, because we love ice cream. And I've been known to get two giant scoops of the melty goodness, which as you can imagine, probably has a billion grams of sugar in it. Especially the kinds with pieces of cake or bits of brownie, or ripples of caramel (aka browned sugar). I know if I want to stick to this diet for any length of time, I'm going to have to get serious about making my own ice cream.
Thankfully, I discovered that Carolyn over at All Day I Dream About Food has a pretty impressive list of low carb ice cream recipes. Last night, I tried her recipe for peanut butter fudge ripple ice cream, and it was pretty darn good. I haven't tried it now that it's fully ripened, but even if it's still kind of hard and icy, it'll still be delicious.
It does call for some things I don't normally have in the house, like Swerve sweetener and almond milk, but I have a trick up my sleeve. My mom and I frequently go to a discount grocery store run by some Amish folks. They go around and buy short dated items and stuff from stores that are closing, and resell it for amazing prices. I got seven bags of Bob's red mill almond flour for $1 a piece! That's a savings of about $60, no kidding. I put it in my big freezer so it'll stay good longer. The other day, I was lucky enough to run across two bags of Swerve sweetener for $2 a piece (it's usually $11 online), and some cartons of almond milk for 69 cents. I love that store! It's funny to listen to other people walking through the store, telling their friends to watch out for outdated food! Folks, the expiration date is a suggestion, not a hard and fast rule. It's almost always still good to eat for a long time after the date (with the exception of certain fresh food and things like nuts and grains, which can go bad/rancid, but you'll definitely know by how bad it smells).
I probably should take some pictures of my ice cream, but it's all the way downstairs and I'm happy right where I am.
I'm thinking about buying some cake/wafer type cones to eat my ice cream on. It's made of starch, but it's practically nothing but air. I believe a whole cone is around 3 carbs. And ice cream just isn't as fun when you eat it with a spoon.
Showing posts with label low carb recipes. Show all posts
Showing posts with label low carb recipes. Show all posts
Wednesday, May 4, 2016
Monday, April 25, 2016
Jaffa Whip
So as I said the other day, I'm going low carb again. My biggest weakness is always sweets. You'd think that I would be able to give them up after all the times they've made me sick, but I just keep going back. I guess I like hurting myself.
I'm not a big fan of artificial sweeteners, but I understand that they have their place. For me, when I'm cutting out sugar, I need something to replace it for a little while until I've gotten over the initial withdrawal.
Thank goodness for Linda over at Linda's Low Carb! I love her website. I probably visit it at least once a week, even when I'm not eating low carb. The recipes are just good and easy and usually pretty healthy. I don't know what I'd do if her website went down; I actually asked Chad if he thought it was crazy to print all her recipes and make a kind of book (he said that yes it would be crazy).
The latest recipe at Linda's is called Jaffa Whip. It's a recipe she found from someone else's website that isn't there anymore (see, I'm not paranoid; it could happen!). Thankfully, she saved it and posted it for all of us. It's supposed to taste like a Jaffa cookie, which I've never had but that sounds delicious. It's a little bit of work to make it, but I have to admit that it's the most delicious thing ever! Here's a picture from Linda's website:
It's extremely hardy, though. Linda says it makes four servings, but I'm going to say it'll probably be more like 6-8 for us. I personally can't eat very much of this in one sitting since I don't have a gallbladder. Usually fat doesn't bother me these days, but this is pretty much a fat bomb, so I have to be careful. But that's ok, because a little really fills you up. Plus, you get your chocolate fix!
Thanks for saving and sharing the awesome recipe, Linda!
Saturday, January 9, 2016
Baconnaise
I just made a really luscious batch of baconnaise. I thought I'd better write the recipe down in case it turns out well. Usually my baconnaise doesn't actually emulsify properly, and gets all hard in the fridge. But it seems to be pretty good this time so far.
Baconnaise
3 egg yolks
2 tbsp vinegar
2 tbsp water
1 tsp sugar
1/2 tsp salt
shake of pepper
1/2 cup liquidy bacon grease*
1/2 - 1 cup high oleic expelled pressed sunflower oil
*Sometimes I get bacon grease that doesn't solidify at room temperature. This is what I used for my baconnaise. If you're using more solid bacon grease, warm it up slowly before using, so it's liquid but not very warm.
Dump first six ingredients into a quart mason jar. Blend together with an immersion blender. Mix together 1/2 cup bacon grease and 1/2 cup of oil in a pourable measuring cup. Slowly add oil mixture into egg mixture while running the blender (you don't have to be very slow. Just don't leave huge puddles of oil on top of the mix).
Once all the oil is blended in, stop and test the mixture. If it's the consistency you like, stop there. If it's thin, continue to add oil slowly until it begins to thicken up, testing frequently to see if you've reached the desired consistency.
If the mix is watery looking and won't thicken up, add another egg yolk.
******************
Good news! It's been a week since I wrote this recipe down, and the baconnaise is still lovely and luscious as ever! I highly recommend it if you've got lots of bacon grease sitting around, or a need for mayo.
Friday, September 27, 2013
Unrecipe: Mexican Parmesan
I have a lot of unrecipes running around in my head; you know, those recipes that are so simple that they don't really require being written down. For me, they're usually the things I make most often. Simple, hearty, everyday food. It's only when I'm feeling creative that I pull out the recipe box.
One of the unrecipes I like to use when I have the ingredients on hand is a simple Parmesan. Usually I do chicken Parm, but it's also delicious with other meats. Pork chops, hamburger, steak, whatever. And I do a version that's way simpler than any recipe you may have seen for it, too, but consequently, it's a lot lower in carbs. It consists of some kind of meat, marinara sauce, mozzarella, and Parmesan. It might not sound like much, but it's quite good.
Well, I decided I would make it tonight, and use some cube steaks from the quarter cow we bought this spring. Except, after I'd gotten the steaks done and went to get out the marinara, I noticed that the jar I had opened had gone moldy. That happens with us a lot these days because we use it so infrequently. Since the meat was already cooked, I had to do something. Thankfully, I'm a master at improvising. Also, I had no Parmesan on hand, so this ended up being a lot more simple than I even planned it on being. But it was delicious!
(Sorry, no picture today!)
Mexican Parmesan
Cook two servings of meat in a skillet with butter. You can use chicken breasts, pork chops, hamburgers, steaks, whatever you want as long as it's quick and easy to cook in a skillet. Once the meat is cooked through, pour a cup of salsa over it and let it simmer for about three minutes. Sprinkle the mozzarella on top, and cover with a lid. Continue to simmer for several minutes, until cheese has melted. Carefully spoon out meat and cheese and salsa and enjoy!
Chad really enjoyed this mean, and since it was so easy and yummy, I'll be making it again. Plus, salsa has a lot fewer carbs and a lot more veggies in it than marinara.
Friday, August 30, 2013
Unrecipe: Glazed Pork Chops
As I'm still on vacation at this point, I thought I'd post something I've been meaning to write about all month. I kind of stumbled upon a fun way to make pork chops the other day that was super yummy, but it's so simple that I couldn't exactly call it a recipe. So I'm calling it an unrecipe.

Basically what I did was I fried up some pork chops in butter, with salt and pepper, in my cast iron skillet until they were done, and then placed them on a plate and put them off to the side. Then I mixed up some low sugar peach jam (home made!), about 1/4 cup, a tbsp or two of vinegar, and an equal amount of homemade ginger beer (I used this because we didn't have any white wine, lol). I put it in the hot skillet with all the pork drippings, on low heat, and stirred until it became slightly thickened. Once thick, I put the pork chops back in the pan and flipped until well coated and until the pork was nice and warm again.
Then I just served with another unrecipe of mine! Frozen green peas, with a little bacon grease, a dash of smoked sea salt, and a generous sprinkling of Parmesan cheese. Mmm! It's amazing how awesome meat and veggies can be.
Monday, August 26, 2013
Recipe Makeover: Mexican Pizza
(I'm on vacation right now, so I wrote this post and a few others last week and scheduled them for this week. So although I'm posting, I'm actually not around!)
I used to love cornbread. I'd buy the Jiffy mixes a lot, but as I started being more frugal and crafty, I started making my own cornbread mixes. Not surprisingly, I used to make a lot of recipes from the Jiffy recipe booklet I sent for long ago.
One of my very favorite cornbread recipe is one I kind of created myself by combining two other recipes. I called it Mexican Corn Pizza, and I made it all the time because it was so simple and so good.
Since the original recipe called for a cornbread mix to make the crust, I thought long and hard about trying to recreate a cornbread mix with almond flour. But that would have been a lot of almond flour, and I'm pretty cheap when it comes right down to it. So instead, I decided to kind of convert Linda's recipe for cheddar biscuits (which I love and make all the time!) to suit my needs. Basically I just made a batch and a half of the biscuit recipe, removed the cheese and most of the garlic powder, and added in the seasonings I put in my original cornbread recipe.
And it came out remarkably good! It tastes almost exactly like the original, except Chad said it doesn't have the same texture (that's because I replace ground beef for pinto beans, lol). Making a 1.5 batch of Linda's biscuits required some fiddly measuring; I plan on working on that sometime, to maybe see if I can round those out to whole measurements to make it a lot easier to make. But it'll just have to do for now!
Low Carb Mexican Pizza
1 pound beef
1/2 tsp onion powder
1/4 tsp garlic powder
1/2 tsp cumin
1/4 tsp oregano
3/4 tsp salt
1 cup salsa
4 oz grated cheddar cheese
Crust:
6 eggs
6 tbsp melted butter
1/4 + 1/8 tsp salt
1/4 tsp garlic powder
2 tbsp chili powder
1 tsp dried parsley
2 tbsp Parmesan cheese
1/3 cup + 2 tbsp + 2 tsp coconut flour
1/4 + 1/8 tsp baking powder
Heat the over to 400 degrees.
In a skillet, cook the beef until browned through. Drain any fat. Mix in the seasonings and the salsa. Set aside.
In a medium bowl, lightly whisk the six eggs. Mix in the butter and the seasonings. Add the coconut flour and the baking powder and mix until well combined. Spread mixture on the bottom of a well greased 9x13 baking dish. Bake the crust for 12-15 minutes, or until firm to the touch.
Remove the crust from the oven, and spread the meat mixture evenly on top. Sprinkle the cheese on top and return to the oven for another 15 minutes, or until the cheese is nice and melty. Let cool for about 5 minutes before serving.

I lined the pan with foil thinking this would help it from sticking. I wouldn't suggest it, though. It just makes it harder to remove! The spatula kept tearing the foil. Next time I'll just grease my dish well and use a small metal spatula to pry the pieces up. It did become much easier to remove after cooled in the fridge, though. I bet this recipe would freeze very well.
Nutrition info:
For 1/8 of the recipe:
Calories: 395
Fat: 29g
Protein: 22g
Carbs: 11g
Fiber: 4g
For 1/6 of the recipe:
Calories: 527
Fat: 39g
Protein: 29g
Carbs: 14
Fiber: 5g
I used to love cornbread. I'd buy the Jiffy mixes a lot, but as I started being more frugal and crafty, I started making my own cornbread mixes. Not surprisingly, I used to make a lot of recipes from the Jiffy recipe booklet I sent for long ago.
One of my very favorite cornbread recipe is one I kind of created myself by combining two other recipes. I called it Mexican Corn Pizza, and I made it all the time because it was so simple and so good.
Since the original recipe called for a cornbread mix to make the crust, I thought long and hard about trying to recreate a cornbread mix with almond flour. But that would have been a lot of almond flour, and I'm pretty cheap when it comes right down to it. So instead, I decided to kind of convert Linda's recipe for cheddar biscuits (which I love and make all the time!) to suit my needs. Basically I just made a batch and a half of the biscuit recipe, removed the cheese and most of the garlic powder, and added in the seasonings I put in my original cornbread recipe.
And it came out remarkably good! It tastes almost exactly like the original, except Chad said it doesn't have the same texture (that's because I replace ground beef for pinto beans, lol). Making a 1.5 batch of Linda's biscuits required some fiddly measuring; I plan on working on that sometime, to maybe see if I can round those out to whole measurements to make it a lot easier to make. But it'll just have to do for now!
 |
| Delicious served with sour cream and beans :) |
Low Carb Mexican Pizza
1 pound beef
1/2 tsp onion powder
1/4 tsp garlic powder
1/2 tsp cumin
1/4 tsp oregano
3/4 tsp salt
1 cup salsa
4 oz grated cheddar cheese
Crust:
6 eggs
6 tbsp melted butter
1/4 + 1/8 tsp salt
1/4 tsp garlic powder
2 tbsp chili powder
1 tsp dried parsley
2 tbsp Parmesan cheese
1/3 cup + 2 tbsp + 2 tsp coconut flour
1/4 + 1/8 tsp baking powder
Heat the over to 400 degrees.
In a skillet, cook the beef until browned through. Drain any fat. Mix in the seasonings and the salsa. Set aside.
In a medium bowl, lightly whisk the six eggs. Mix in the butter and the seasonings. Add the coconut flour and the baking powder and mix until well combined. Spread mixture on the bottom of a well greased 9x13 baking dish. Bake the crust for 12-15 minutes, or until firm to the touch.
Remove the crust from the oven, and spread the meat mixture evenly on top. Sprinkle the cheese on top and return to the oven for another 15 minutes, or until the cheese is nice and melty. Let cool for about 5 minutes before serving.

I lined the pan with foil thinking this would help it from sticking. I wouldn't suggest it, though. It just makes it harder to remove! The spatula kept tearing the foil. Next time I'll just grease my dish well and use a small metal spatula to pry the pieces up. It did become much easier to remove after cooled in the fridge, though. I bet this recipe would freeze very well.
Nutrition info:
For 1/8 of the recipe:
Calories: 395
Fat: 29g
Protein: 22g
Carbs: 11g
Fiber: 4g
For 1/6 of the recipe:
Calories: 527
Fat: 39g
Protein: 29g
Carbs: 14
Fiber: 5g
Tuesday, August 20, 2013
Recipe Makeover: Stuffed Zucchini
It's that time of year where zucchini is more abundant than annoying low-fat advocates. I've always enjoyed cooking with zucchini, but I tend to only use it in the summer when it's in season in our area. I also try to only use local zucs, because, believe it or not, zucchini is one of the most common GMO plants you find in the store. Scary, right?
When I was low-calorie and vegetarian, I created a nifty way to use up the bumper crop of squash I was getting from my garden. Of course, it was low in fat and used fake meat, but it was surprisingly easy to convert.
Stuffed Zucchini
12 oz package pork sausage (or 1 pound ground beef if you don't do pork/processed meat)
2 medium zucchinis (6-8 inches long)
1-2 tbsp chopped chives (to taste)
2 cloves minced garlic
4 oz shredded cheddar cheese (1 cup)
1/2 cup marinara sauce
Preheat oven to 350 degrees.
Slice zucchinis in half lengthwise and scoop out insides with a spoon, leaving a thin shell. Place the shells into a greased or lined baking dish big enough to hold them. Rough chop zucchini innards and place into a skillet with sausage and garlic. Fry on medium heat until sausage is no longer pink and water from zucchini has evaporated.
Mix in the chives and cheese, and then spoon equal amounts of the meat mixture into the zucchini shells. Spoon about 2 tbsp marinara sauce onto each stuffed zucchini. Place into the oven and bake for 45 minutes, or until zucchini shell is tender.

It's quite good, if not a little simplistic. I think next time I'll add more veggies as filler.
Nutrition info:
One zucchini half:
Calories: 438
Fat: 35g
Protein: 26g
Carbs: 7g
Fiber: 1g
Monday, August 12, 2013
Recipe Makeover: Stuffed Peppers
When I was a kid, I hated a lot of vegetables. I'd only eat onions if they were baked into bagels, celery was only good raw (and with peanut butter or cream cheese), tomatoes were only good cooked, and peppers... well, peppers were completely out of the question. They tasted nasty and bitter raw, and they were slimy and somehow still bitter when they were cooked. I spent many a meal picking peppers out of my stir-fries or hash browns or soup. Yuck.
However, as I grew older, I decided I should probably subsist on more than cheese and rice, and I started making an effort to actually enjoy onions, tomatoes, and peppers (but not celery). The first recipe I ever made that featured a lot of peppers was a creation of my own; a vegetarian, low calorie stuffed pepper. And it was delicious. Even after going low carb and eating meat again, I still longed for my delicious stuffed peppers.
When I decided I would start converting my old recipes to fit into my low carb lifestyle, I knew this would be one of the first recipes to be converted. The first time I tried making it low carb was kind of a failure, but I kept trying, and the second attempt was a success! It tastes exactly like my old recipe. Actually, it tastes a lot better because it uses real meat instead of the nasty soy-meat I used to eat.
(I'm actually eating leftovers right now, lol!)

Low Carb Stuffed Peppers
4 large green peppers (although you can use red and yellow if you'd like)
1 pound ground beef
1 can (14.5 oz) Italian seasoned diced tomatoes
1 tbsp chili powder
1/2 tsp onion powder
2 cloves garlic, minced (or 1 tsp of the jarred minced garlic)
1/2 tsp salt
2 cups cauliflower rice*
4 oz shredded cheddar cheese
Preheat oven to 350 degrees.
Prepare the peppers by cutting off the tops and scooping out the seeds and membranes. If the pepper is lopsided and won't sit flat, cut part of the bottom off to make it flat and either wrap the bottom in foil or place it in a ramekin to keep the juices from flowing out.
Brown and crumble the beef. Drain any fat you may have. (I used a package of ground beef from the grass fed cow we bought and I was surprised at how little fat there was; I didn't need to drain it at all.) Add the can of tomatoes, undrained, along with the spices. Let simmer 5-10 minutes or until the juices from the tomatoes have thickened somewhat. Remove from heat and mix in the cauliflower and the shredded cheese.
Stuff each pepper with 1/4 of the mixture. Any leftovers can be eaten later plain or in a salad. Place peppers in a lined or greased baking dish. Bake peppers for 1 to 1-1/2 hours depending on how well done you want your peppers. One hour will leave them slightly crunchy still, whereas 1-1/2 hours will leave them softer.

If you're in a hurry or don't want the oven on for an hour, you can also pan fry the peppers and spoon the meat filling over top of them.
They're especially delicious reheated the next day!

*The easiest way I've found to make cauliflower rice is to steam the cauliflower, and then lightly mash it with a potato masher. It comes out just the right size without having to go to all the work of putting it through the food processor.
Nutritional info:
For one pepper:
Calories: 408
Fat: 19g
Protein: 40g
Carbs: 17g
Fiber: 4g
Monday, August 5, 2013
Recipe Makeover: Lasagna
When I was growing up, we'd eat lasagna all the time. We don't have any Italian in our blood, which is probably why mom's lasagna always featured cottage cheese instead of ricotta, and canned spaghetti sauce instead of homemade tomato sauce. But it was delicious nonetheless, and I continued to make it often when I moved out on my own.
The thing with lasagna is that it's usually made with lots of pasta. Lasagna noodles, anyone? And the way I made it when I was out on my own was always meatless, either just with cheese or with meatless soy crumbles. Yum.
However, in the peak of summer, I remember my mom always making zucchini lasagna, using sliced zucchini instead of pasta. It was fantastic, and I knew it would be the best way to convert a high carb meal into something low carb and nutritious.
The best thing about zucchini is that it's so easy to grow. I've only gotten one out of my garden so far, but we have a local farmer that's grown so much this year that she's been selling it for 3 for a $1!
I've found the easiest way to get zucchini noodles is by using a mandolin slicer. It doesn't even have to be an ultra fancy, super dangerously sharp one, either, because zucchini is so soft. I got mine at Aldi for $4, and it works like a charm on zucchini.

If you don't have a mandolin, and don't have the confidence to slice the zucchinis lengthwise, it will taste just the same if you slice them into coins.
My mom always would dip her zucchini in eggs and flour and fry them before using them as noodles, but it saves a lot of time, trouble, and carbs by just using plain raw zucchini. She would also use fried eggplant once in a while, but I've never been a huge fan of eggplant and can't really justify ruining a whole lasagna by using them. (And yet I tried to grow eggplants last year; I guess I thought I'd like them more if they came from my garden. I didn't, by the way.)

And the best thing about zucchini lasagna is that it makes enough to last for several days, and it's a whole meal in one. Meat, cheese, good fats, vegetables.
 Chad would eat two pieces for a meal, whereas one piece was just right for me. For some of you, a whole piece might be too big, so of course you can cut it into as many pieces as you want.
Zucchini Lasagna
1 pound ground beef
12 oz package pork sausage OR 1 extra pound ground beef or pork (in case you don't do pork/processed meat)
8 oz shredded whole milk mozzarella cheese
1/2 cup grated Parmesan cheese
15 oz container whole milk ricotta cheese
2 cups marinara sauce, divided
2 eggs
1/8 teaspoon onion powder
1/8 teaspoon garlic powder
1 tablespoon dried parsley OR 3 tablespoons fresh parsley
3 medium zucchinis, sliced about 1/4 inch thick
Heat oven to 400 degrees.
In skillet, brown beef and sausage together. Once completely browned, drain most of the fat and add 1-1/2 cups marinara sauce. Mix well and set aside.
In a large bowl, combine ricotta, Parmesan, eggs, and seasonings. Set aside.
Spread 1/2 cup marinara sauce on the bottom of a 9x13 baking dish. Next, layer on the ingredients in this order:
zucchini noodles
1/3 of the meat sauce
1/2 of the ricotta mix
1/3 of the mozzerella
zucchini noodles
1/3 of the meat sauce
1/2 of the ricotta mix
1/3 of the mozzerella
zucchini noodles
remaining meat sauce
remaining mozzerella
Place into oven uncovered and bake for 30 minutes. Check to make sure cheese isn't burning. If it looks like it's starting to brown at this point, add a piece of greased foil to the top. Bake for 30 more minutes, or until quite bubbly and cheese is nicely browned. Remove the cover if you added one.
This next step is important: let sit for 20 minutes. You can eat it immediately, however it's going to be soup if you try it. Letting it rest gives it time to get rid of most of the moisture from the zucchini, and plus it's extremely hot straight out of the oven!
The first piece is always messy, no matter what you do.

If you're more of a cheese fan, go ahead and top the lasagna with another 4 oz (1 cup shredded) mozzarella. I thought it was delicious with just 8 oz total though.
Nutrition facts:
For 1/8 piece:
Calories: 541
Fat: 40
Protein: 36
Carbs: 9
Fiber: 1
For 1/10 piece:
Calories: 433
Fat:32
Protein:29
Carbs: 7
Fiber: < 1
The thing with lasagna is that it's usually made with lots of pasta. Lasagna noodles, anyone? And the way I made it when I was out on my own was always meatless, either just with cheese or with meatless soy crumbles. Yum.
However, in the peak of summer, I remember my mom always making zucchini lasagna, using sliced zucchini instead of pasta. It was fantastic, and I knew it would be the best way to convert a high carb meal into something low carb and nutritious.
The best thing about zucchini is that it's so easy to grow. I've only gotten one out of my garden so far, but we have a local farmer that's grown so much this year that she's been selling it for 3 for a $1!
 |
| The one on the right is a Cocozelle zucchini from my garden. |

If you don't have a mandolin, and don't have the confidence to slice the zucchinis lengthwise, it will taste just the same if you slice them into coins.
My mom always would dip her zucchini in eggs and flour and fry them before using them as noodles, but it saves a lot of time, trouble, and carbs by just using plain raw zucchini. She would also use fried eggplant once in a while, but I've never been a huge fan of eggplant and can't really justify ruining a whole lasagna by using them. (And yet I tried to grow eggplants last year; I guess I thought I'd like them more if they came from my garden. I didn't, by the way.)

And the best thing about zucchini lasagna is that it makes enough to last for several days, and it's a whole meal in one. Meat, cheese, good fats, vegetables.

Zucchini Lasagna
1 pound ground beef
12 oz package pork sausage OR 1 extra pound ground beef or pork (in case you don't do pork/processed meat)
8 oz shredded whole milk mozzarella cheese
1/2 cup grated Parmesan cheese
15 oz container whole milk ricotta cheese
2 cups marinara sauce, divided
2 eggs
1/8 teaspoon onion powder
1/8 teaspoon garlic powder
1 tablespoon dried parsley OR 3 tablespoons fresh parsley
3 medium zucchinis, sliced about 1/4 inch thick
Heat oven to 400 degrees.
In skillet, brown beef and sausage together. Once completely browned, drain most of the fat and add 1-1/2 cups marinara sauce. Mix well and set aside.
In a large bowl, combine ricotta, Parmesan, eggs, and seasonings. Set aside.
Spread 1/2 cup marinara sauce on the bottom of a 9x13 baking dish. Next, layer on the ingredients in this order:
zucchini noodles
1/3 of the meat sauce
1/2 of the ricotta mix
1/3 of the mozzerella
zucchini noodles
1/3 of the meat sauce
1/2 of the ricotta mix
1/3 of the mozzerella
zucchini noodles
remaining meat sauce
remaining mozzerella
Place into oven uncovered and bake for 30 minutes. Check to make sure cheese isn't burning. If it looks like it's starting to brown at this point, add a piece of greased foil to the top. Bake for 30 more minutes, or until quite bubbly and cheese is nicely browned. Remove the cover if you added one.
This next step is important: let sit for 20 minutes. You can eat it immediately, however it's going to be soup if you try it. Letting it rest gives it time to get rid of most of the moisture from the zucchini, and plus it's extremely hot straight out of the oven!
The first piece is always messy, no matter what you do.

If you're more of a cheese fan, go ahead and top the lasagna with another 4 oz (1 cup shredded) mozzarella. I thought it was delicious with just 8 oz total though.
Nutrition facts:
For 1/8 piece:
Calories: 541
Fat: 40
Protein: 36
Carbs: 9
Fiber: 1
For 1/10 piece:
Calories: 433
Fat:32
Protein:29
Carbs: 7
Fiber: < 1
Thursday, July 25, 2013
My Favorite Breakfast Food
When I was growing up, my mom would make a special breakfast on weekends. Instead of cold cereal, she'd fry up some eggs and bacon, have a pan full of home fries, and there would always, always be pancakes. She'd make big stacks of them, and we'd pile them high with butter and syrup.
That was a tradition I continued having when I moved away and married Chad. Not every weekend, but many weekends, we'd fry up the eggs, cook the vegetarian sausage, and make stacks of pancakes covered in butter and syrup. Well, until we went low carb, anyway. Then pancakes were strictly off limits.
I tried a few different substitute recipes. Nothing really pleased me, though. They were usually really grainy, bland, and fell apart easily. When I did make some half decent pancakes, Chad didn't enjoy eating them because they didn't have syrup on them.
So you can imagine my trepidation when I saw a recipe for coconut pancakes in Dr. Fife's Cooking with Coconut Flour book. I wanted to try it, but I knew they probably wouldn't turn out very well. And even if they were good, Chad wouldn't like them because there was no syrup.
Enter low sugar jam.

As soon as I made my first batch of low sugar jam (it has only 1/2 cup sugar in a batch of 6 jars), I knew this would be the perfect topping for pancakes. That's when I decided to try the coconut flour pancakes.
And OMG, they're so good! They taste almost exactly like real pancakes. The only difference that I can tell that they actually fill us up instead of leaving us hungry in an hour or two the way traditional pancakes do.
They're easy to make, too, and use ingredients I always have on hand. The cool thing about coconut flour is that, even though it's kind of pricy, you only use a little bit of it in recipes. That's why I like using coconut flour instead of almond flour, which is not only more expensive, but you use the same quantities as you would regular flour and you can go through a $10 bag after two recipes.
Pancakes make an easy bread substitute, too. You don't have to make a whole loaf of bread if all you want is two sandwiches. Just make a batch of pancakes and there you go.

Chad had to show off his manly appetite by slathering butter on top of his sandwich.

And this weekend, we decided to try blueberry coconut pancakes since we still have 5 pounds of blueberries sitting in the freezer.

These were so heavenly. No need for syrup or jam if you're using good sweet berries. Just a little butter and they're soooo awesome. Next time, we plan on trying raspberry pancakes since I have lots of raspberries too!
I really highly recommend the book Cooking with Coconut Flour. I plan on writing a nice review of the book in a couple of days, but go ahead and check it out on Amazon if you can't wait.
I did contact Dr. Fife and asked if I could reproduce a couple of the recipes form his book. He very graciously gave me permission! I hope you'll try this pancake recipe out, and go check out Dr. Fife's Cooking with Coconut Flour.
Coconut Flour Pancakes
2 eggs
2 tbsp coconut oil or butter, melted
2 tbsp coconut milk or whole milk
1 tsp sugar*
1/8 tsp salt
2 tbsp sifted coconut flour
1/8 tsp baking powder
Blend together eggs, oil, coconut milk, sugar, and salt. Combine coconut flour and baking powder and thoroughly mix into batter. Heat 1 tbsp of coconut oil in a skillet. Spoon batter onto hot skillet making pancakes about 2-1/2 to 3 inches in diameter. Batter will be thick but will flatten out when cooking. Makes about 8 pancakes.
*I have successfully made these pancakes by substituting stevia, substituting xylitol, and leaving out the sweetener all together.
Recipe reprinted from the book "Cooking with Coconut Flour" used with permission from the author. Published by Piccadilly Books, Ltd. www.piccadillybooks.com. All rights reserved.
That was a tradition I continued having when I moved away and married Chad. Not every weekend, but many weekends, we'd fry up the eggs, cook the vegetarian sausage, and make stacks of pancakes covered in butter and syrup. Well, until we went low carb, anyway. Then pancakes were strictly off limits.
I tried a few different substitute recipes. Nothing really pleased me, though. They were usually really grainy, bland, and fell apart easily. When I did make some half decent pancakes, Chad didn't enjoy eating them because they didn't have syrup on them.
So you can imagine my trepidation when I saw a recipe for coconut pancakes in Dr. Fife's Cooking with Coconut Flour book. I wanted to try it, but I knew they probably wouldn't turn out very well. And even if they were good, Chad wouldn't like them because there was no syrup.
Enter low sugar jam.

As soon as I made my first batch of low sugar jam (it has only 1/2 cup sugar in a batch of 6 jars), I knew this would be the perfect topping for pancakes. That's when I decided to try the coconut flour pancakes.
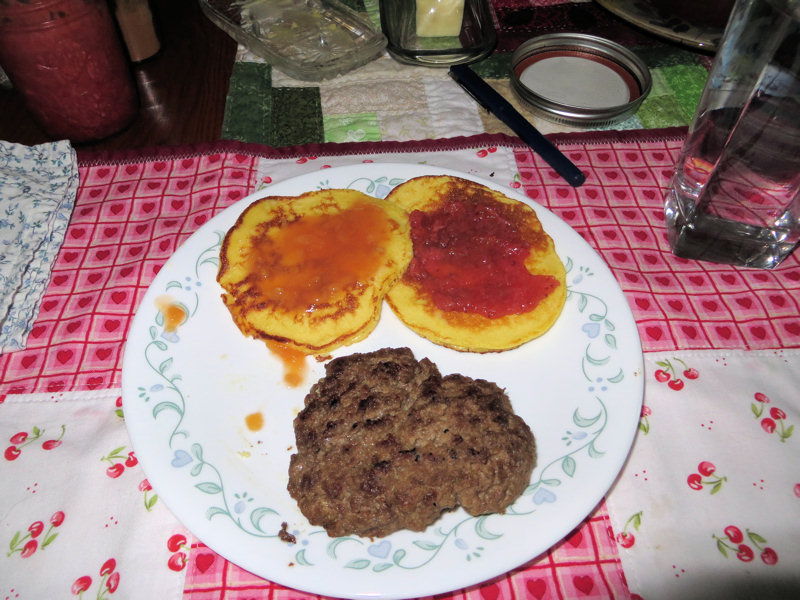 |
| Yes, hamburger and pancakes. |
And OMG, they're so good! They taste almost exactly like real pancakes. The only difference that I can tell that they actually fill us up instead of leaving us hungry in an hour or two the way traditional pancakes do.
They're easy to make, too, and use ingredients I always have on hand. The cool thing about coconut flour is that, even though it's kind of pricy, you only use a little bit of it in recipes. That's why I like using coconut flour instead of almond flour, which is not only more expensive, but you use the same quantities as you would regular flour and you can go through a $10 bag after two recipes.
Pancakes make an easy bread substitute, too. You don't have to make a whole loaf of bread if all you want is two sandwiches. Just make a batch of pancakes and there you go.

Chad had to show off his manly appetite by slathering butter on top of his sandwich.

And this weekend, we decided to try blueberry coconut pancakes since we still have 5 pounds of blueberries sitting in the freezer.

These were so heavenly. No need for syrup or jam if you're using good sweet berries. Just a little butter and they're soooo awesome. Next time, we plan on trying raspberry pancakes since I have lots of raspberries too!
I really highly recommend the book Cooking with Coconut Flour. I plan on writing a nice review of the book in a couple of days, but go ahead and check it out on Amazon if you can't wait.
I did contact Dr. Fife and asked if I could reproduce a couple of the recipes form his book. He very graciously gave me permission! I hope you'll try this pancake recipe out, and go check out Dr. Fife's Cooking with Coconut Flour.
Coconut Flour Pancakes
2 eggs
2 tbsp coconut oil or butter, melted
2 tbsp coconut milk or whole milk
1 tsp sugar*
1/8 tsp salt
2 tbsp sifted coconut flour
1/8 tsp baking powder
Blend together eggs, oil, coconut milk, sugar, and salt. Combine coconut flour and baking powder and thoroughly mix into batter. Heat 1 tbsp of coconut oil in a skillet. Spoon batter onto hot skillet making pancakes about 2-1/2 to 3 inches in diameter. Batter will be thick but will flatten out when cooking. Makes about 8 pancakes.
*I have successfully made these pancakes by substituting stevia, substituting xylitol, and leaving out the sweetener all together.
Recipe reprinted from the book "Cooking with Coconut Flour" used with permission from the author. Published by Piccadilly Books, Ltd. www.piccadillybooks.com. All rights reserved.
Sunday, July 14, 2013
Low Carb Indulgence
I got two pounds of xylitol at the beginning of June, and I've been having fun playing with it to see how best to use it. It's pretty neat, in that it can be measured cup for cup with regular sugar, and it has a lot of the same properties as sugar, too. As with most sugar alcohols, you have to be careful with how much you eat or you could get an upset stomach, but the threshold is mush higher for xylitol. Plus, xylitol is actually good for tooth health.
One of my favorite uses for it so far has been ice cream. Yes, ice cream. You can go buy CarbSmart low carb ice cream from Breyers if you're really craving it, but I always feel weird about the ten mile long ingredient list it sports, and your only choices for flavor are chocolate and vanilla.
I actually have been making ice cream for a while. I have a nice KitchenAid mixer, and bought an ice cream maker attachment for it. It works very well. But when we went low carb, that seemed pretty much out of the question. You may be asking, why didn't I just replace the sugar with stevia or something similar. Well, that's simple. The thing that makes ice cream soft and creamy is.... sugar. Without sugar, your ice cream turns into ice, and no one likes rock hard ice cream.
However, as I said earlier, xylitol has many of the same properties as sugar, so I knew I wanted to try using it for ice cream at least once!
I ended up using this recipe from Food.com. And it was delicious!! If no one told you, you'd think it was normal sugary ice cream.
While I still had ice cream, I also decided to try a chocolate sauce recipe with xylitol. Chocolate is a finicky creature. It's very hard to do sugar free chocolate unless you use a sugar alcohol to sweeten it. Stevia and Splenda both make chocolate taste incredibly bitter no matter how much sweetener you add. I've had a recipe on hand for a while that I've been meaning to use. I'd like to link to it, but I can't find the link anywhere, so here instead is the recipe! If anyone can figure out where this recipe is from, let me know and I'll put it up here.
Sugar Free Chocolate Sauce
3 oz unsweetened chocolate (not cocoa powder)
2 tsp butter
1/2 c cream
1/2 tsp vanilla extract
6 tbsp xilitol
Pinch stevia
4-6 tsp water
Powder xylitol with stevia in food processor. Melt chocolate and butter in double broiler, stirring until smooth. Stir in cream and sweetener slowly, and whisk until smooth. Remove from heat and add vanilla, and enough water for the right consistency. Pour into container and store in the fridge.

OMG, I have to tell you that the chocolate sauce is soooo good. It will be runny at first, but once you stick it in the fridge, it thickens up nicely. I'm thinking about altering the recipe to make it into fudge. Maybe remove the water and reduce the cream just a little.
And together? Now that's heaven.

Wednesday, July 3, 2013
Jammin'
So I promised a while ago that I would do a walk through of my low sugar jam making process. And since I've promised that, I've made up two new batches of ls jam; peach and blueberry. Between the two batches, I think I managed to get enough pictures for a good post.
Jam is fun. It's the best way to introduce yourself to canning, because it's quick, easy, and almost fool-proof. Of course, the problem with traditional jam is that you literally use more sugar than fruit. When I told my mother-in-law that, she said, "Next time you make me jam, just use less sugar," but it's not that easy. Jam and jelly making is an exact science. You have to have the right amount of acidity so it gets properly preserved, the right amount of fruit and pectin, and the exact amount of sugar or else you don't get a proper jell. If I just left out some of the sugar in a traditional jam recipe, chances are it would turn out pretty badly.
The good news is that they make low- or no-sugar needed pectin these days, that will jell nicely without the need for large quantities of sugar. Here's two very good brands to try out:


Both brands of pectin come with their own instructions. Always follow the instructions on the pectin you're using! This walkthrough is here just to show you what you need before you start and the basic steps taken in jam making so you can see how easy it is.
So let's get started!
The first step you should take is to buy any items you need for canning. Fruit, of course, is an important ingredient. You'll also need 8 oz jelly jars, metal lids and bands for the jars, pectin, a jar lifter, a ladle, a wooden spoon, a large pot to cook the jam, a water bath canner to can the jars of jam (a large stock pot will work well, too, as long as you have 1 inch of water above the tops of the jars), and a rack to put at the bottom of the canner (if you're using a stock pot, you can make your own rack out of extra jar bands).
Those are the essential items you need. There are some nonessential things that just make the job easier. Those include a lid wand, a jar measure, a canning funnel, a small pot to boil the lids in, and a good potato masher.
Don't feel overwhelmed by that long list of stuff you need. Most kitchens already have everything needed, and the things you don't have are very inexpensive, and can generally be found in Walmart, Kmart, and most hardware stores (I don't really understand why, but hardware stores usually have the best selection of canning supplies).
You should decide before hand how much jam you want to make. The kind of pectin I used (Ball Low or No-Sugar Needed) said you should never make more than 10 jars of jam at once, or the jam may not set a proper jell. I've actually experienced this before; it's not very fun to have your hard work turn out runny. Here's the recipe on the Ball pectin:
*Never use fresh lemon juice, even though it tastes better. The reason? You need a certain level of acidity, or you risk harboring really nasty bacteria in your jam. Bottled lemon juice is the same acidity all the time, but fresh lemon juice varies a lot.
For my blueberry jam, I decided I wanted to make six 8oz jars of jam. That means I needed 6 cups of crush fruit. Ball has a decent produce buying guide PDF that gives you the amount of prepared fruit you get per pound. My suggestion is to always buy extra, though, because it's better to have too much than too little.
Since I needed 6 cups of prepared fruit, that means I needed to buy about 3.5 pounds of fruit. I ended up buying 4.5 pounds, and had 12 oz left when I was done.
You don't have to be so scientific about it, either. With the peaches, I just started with a huge box of peaches and peeled and chopped them until I had 8 cups of fruit (to make 8 jars). Then I froze the leftover peaches to make peach applesauce later in the year.
(Confused yet?)
Alright. So now you have the fruit. You have the jars, lids, bands, canner, and everything else you need to start canning. Let's get canning!
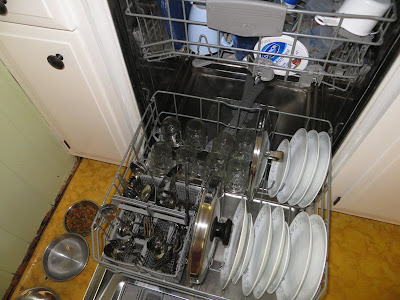
The first thing you want to do is wash the jars, lids, and bands. The easiest way to can is to stick your jars in the dishwasher and put it through a full cycle. This gives you enough time to prepare everything and get everything set up, and it fully sanitizes the jars and keeps them hot for when you fill them with jam.
You don't need a dishwasher, of course, and you should hand wash the bands and lids anyway. If you don't have a dishwasher, that just means you have to hand wash the jars and follow an extra step later.
Once the jars are in the dishwasher, the next thing I do is I start cleaning.

My kitchen is usually a mess, but I can only can when the kitchen is spotless.

Canning is a very messy job, and dishes start stacking up quickly, so if your sink is already full, you'll run out of room in no time. So it's better to start off clean.
Next, lay out your supplies.

My kitchen is small, but I'm grateful for the small counter next to the stove. If you don't have a piece of counter next to your stove, setting up a table nearby to hold your supplies might be helpful.

I use three pots in my operation: water bath canner (black pot on the right), large pot to make the jam in (bottom left), and very small pot to boil the lids in (top left). Only the first two are really necessary.

I always lay down large rags on my counter before canning. It makes the clean up easier, and also, the counter is a butcher block and dark fruit stains it pretty easily. It's helpful to get all your tools out before hand, so you're not scrambling around looking for them later. Pictured are (from left to right) several rags, jar bands, jar lifter, jar measure, canning funnel, lid lifter, wooden spoon with a spoon rest, ladle, and extra jar for measuring water depth in the water bath canner.
I usually have a little time between setting up and needing to start the canning process. This is a perfect time to figure out how much of each ingredient you need. Since I was making 6 cups of jam, according to the recipe above, I would need 6 cups fruit, 1 cup water, 3 tbsp lemon juice, and 4.5 tbsp pectin. It also helps to measure it out before hand so it's ready when you need it.

When there's about 45 minutes left on the dishwasher, that's when I start working. First, I fill up the water bath canner. It's easiest to put it on the burner you want and use another pot to bring water to it. When it's full, it's very heavy. Use the extra jar to determine how much water you need. When all the jars are in the canner, there needs to be 1 inch of water above the tops of the jars. I usually fill the canner up until it reaches the edge of my extra jar, because the filled jars will displace more water and usually bring it up to the level needed. You don't want too much water, or it'll take forever to boil. If you have hard water like I do, add about 1/2 cup distilled white vinegar to the water to keep it from leaving white deposits on your jars.
Once full, put the lid on the canner and turn the heat on to HIGH. By the time the dishwasher is done and the jam is ready, the canner should be at a full boil.
If you don't have a dishwasher, there is an extra step you need to take at this point. Put the rack in the bottom of the canner and add the empty jars. When you're jam making with a water bath canner, your jars do not need to be sanitized, but they do need to be very hot when you add hot jam to them or you risk damaging the glass. I've never had a problem with using cold jars in the past, but these days, I'd rather play it safe.
Next, it's time to wash and prepare the fruit. This can take different amounts of time depending on what kind of fruit you're preparing.

Blueberries were pretty easy. The part that takes the most time is sorting out the bad ones and any stems.

The peaches, on the other hand, took forever. Peaches are involved; you have to remove the pits, then dip them in boiling water to remove the skins, and then finely chop them. I think it took me two hours to fully process all the peaches, and my hands were in agony by the time I finished. Which I think is why I like working with berries better.

With berries, you always crush them. You can use a fork or a wooden spoon, but the easiest way is with a potato masher. Never put them through a food processor or the consistency isn't right. You end up with more of a berry butter instead of a jam. And it's easiest to crush them one layer at a time. This way you know that every berry is being crushed.
After crushing each layer, pour it into a measuring cup so you can keep track of how much processed fruit you have.

I like to put the lemon juice in the pot, so that every time I fill up my measuring cup, I can empty the fruit into the pot and mix it with the lemon juice. That way, the lemon juice keeps the fruit from browning while I prepare the rest of it.

When there's about 10-20 minutes left on the dishwasher, I like to get the jam started. First, I put my lids in the small pot and turn the burner on to medium low. The water doesn't need to boil, it just needs to get hot. The point is to soften the sealant on the lids so they create a better seal when you put them on the jars. If you don't have room for a third pot, you can also put the lids in a large glass bowl and add boiling water to them. By the time the jam is done, the sealant should be softened.
Now it's time to get jammin'. Slowly add the pectin to the fruit, water, and lemon juice mixture, making sure to stir it in well.

Once incorporated, turn the heat on to HIGH, and start stirring! This process takes a while, but you need to be there to make sure the fruit doesn't scorch.

So keep stirring! Eventually, you may notice the fruit is getting more syrupy.

And darker.

That's my spoon rest. The juice on the left is from when I started, and the fruit on the right is from right before it started boiling.
Keep stirring and heating the fruit until it comes to a full rolling boil. This is important. A full rolling boil is a boil that you cannot stir down with your spoon. You may see bubbles when you stop stirring, but if you can stir them down, it's not ready yet.
Usually for me, I can tell it's about to boil when I start seeing some foam around the edges of the fruit.

Once you reach a full rolling boil, this is the time to add any sugar you want in it. I know you don't want sugar; neither do I, but for most fruit, you need a little bit to make it taste good. DO NOT add artificial sweeteners; they don't stand up to the high heat of the canning process. Some people say they've had success with Splenda, and some people have had good results with stevia. However, the only sweeteners I would recommend are sugar, xylitol, and erythritol.
I always start out with a 1/2 cup of sugar. Add it to your jam, stir it in well, and then taste it.

It's best to put a little bit on the spoon rest and get a little on your finger in order to taste it. Putting a spoon directly into the pot and then directly into your mouth is a good way to burn yourself.
If it tastes too sour, another 1/2 cup of sugar. But honestly, 1 cup of sugar would be my limit. Remember that you're not trying to recreate the jam you buy in the store; you're trying to make something that's fresher, more fruity, less sugar-bomby. The recipe also says you can use fruit juice instead of water, to naturally sweeten your jam if you so desire. I plan on trying it sometime to see how it works.
For my blueberry jam, I added 1/2 cup of sugar and 1/2 cup of xylitol.
Once you have the sweetness to your liking, it's time to start stirring again. The goal is to bring it up to a full rolling boil again, which shouldn't take as long as last time. Remember to watch for the foam starting to foam around the edges, and don't stop stirring until you can't stir the bubbles down anymore.
Once you reach a full rolling boil, set a kitchen clock to 1 minute, and stop stirring. Let it fully boil on it's own for exactly 1 minute.

After the minute is up, turn the heat off for the jam. Let it rest for a minute or so, and if you see any foam on top, skim it off (save the foam, though; it's still delicious, it's just not good for the canning process). I don't usually get much foam with my low sugar jam though, thankfully.
The jam is done now. Technically, you could stop right here if you wanted to. You could store the jam in the refrigerator, or in the freezer with proper containers. The problem is that this jam doesn't have any preservatives, so it will only last about a week in the fridge, and if you make a large batch, it will take up a lot of room in the freezer. That's why water bath canning is awesome. You can can it and it will be shelf stable for 1 year.
Now it's time to fill the jars. Always work with only one jar at a time. If you have a dishwasher, get out one jar and then close the dishwasher again to keep the heat in.
If you don't have a dishwasher and you put your jars in the canner, remove one jar at a time with your jar lifter and then return the lid.
If you have a water bath canner with a canning rack, at this point you should raise the rack up so that it's attached to the sides of the canner and the bottom is near the top of the water. That's confusing. The only picture I have is near the end of the process.

As you fill each jar, you'll put it on th. rack and then put the lid back on. This way, the jars stay warm as you work, and by not being in the water, the fruit won't get over cooked. If you have empty jars in the canner because you don't have a dishwasher, don't worry; they'll stay warm enough until you need them as long as the lid is on the pot.
Ok, now, time to fill those jars. Start by putting the canning funnel into your jar if you have one. This cuts down on a lot of mess.

Now ladle jam into the jar. For jam, you want to fill it up to within 1/4 of an inch from the top. That's where the jar measure comes in handy.

Now wipe the rim of the jar with a damp rag. Make sure it's squeaky clean, or you may not get a proper seal.

Lift a lid out of the hot water and put it on top of the jar, then add a band over top of that. The band should be finger tip tight on the jar. I'm not sure what that means exactly, so I usually take it literally by tightening only as tight as my finger tips can tighten it. Don't over tighten the band, or the jar may not vent properly while it's in the canner (it needs to release oxygen from the jar as it boils so that it seals properly).
Now lift the jar with your jar lifter and put it on the rack.

Careful, though. The canner is probably very hot at this point. Use a rag or a pot holder to remove the lid, and watch out for steam.

Continue working until all the jars are filled. If you have left over jam, but not enough to completely fill another jar, you can stick it in the fridge and it will keep well for a week or so.
Once the canner is full, carefully lower the rack into the water. Make sure to stand up any jars that may have fallen over. Put the lid back on and wait for it to begin boiling again. It usually only takes a couple of minutes for me. You'll know it's boiling when a little steam is escaping from the lid. You can safely take quick peeks once in a while without ruining the boil. Once it's fully boiling again, start a kitchen timer for 10 minutes.
If you live at higher altitudes, you'll need to adjust that time a little bit. Here's a chart for adjusting the time. So for where I live, I need to add 5 minutes to the processing time, and set my timer for 15 minutes.
At this point, it's a good time to clean up a little. I like to throw all the sticky utensils into the jam pot and fill it with hot soapy water.

If you get it when it's fresh, jam is easy to clean. If you let it dry out, it can be a pain in the butt.
When your timer beeps, turn the heat off from under your canner. Take the lid off, and set the timer for another 5 minutes. This is to let the cans cool a little bit before removing them from the water.
When the timer goes off again, remove each jar from the canner and put it on a towel in a nondrafty area. Don't tilt the jar, even to remove the water on top. You may ruin the seal if you do that.

Yes, I did two batches of jam that day; one low sugar for me, and one half sugar for my mother-in-law. She loves jam, so I make it for her once in a while. But when she found out that it's mostly sugar, she told me to make it with low sugar like I make for myself. Well, I know my MIL well. She's a carbaholic. I sent her over some of my low sugar jam to try first, and as predicted, she said it was too tart. So we decided the best option for her was a recipe that uses about half as much sugar as a normal recipe would. She hasn't tried it yet, but I'm sure she'll like it.
Once the jam is all done, let it sit in a nondrafty area for 24 hours before moving it. If you're using metal lids, check each one for a seal by pressing the top. If it flexes inward, it isn't sealed and should be refrigerated. If it doesn't move any when you press it, congrats! You have a sealed jar of jam.
At this point, you can remove the bands if you want (they tend to rust if you leave them on) and store the jars in a cool, dark place. They will stay good for 1 year, but usually can still be eaten after that point. Just make sure to smell every jar after you open it. If it smells yucky or sour, throw it away.
So what do I use my jam for? I don't eat bread anymore (except the occasional coconut biscuit), so what could I put it on? Well, one of my favorite ways to use it is in plain full fat yogurt.

And when I get ambitious and make coconut pancakes, we use jam instead of syrup.

(Yes, that's a hamburger. With my pancakes. It was delicious.)
I think that concludes my jammin' post. Did I cover everything? I sure hope so, 'cause this post took forever to write! Making jam isn't very hard. If you do it in summer, when fruit is plentiful and cheap, it can really save you a lot of money. I think it cost me about $1 a jar for the blueberry jam, whereas if you buy sugar free jam in the store, it can cost upwards of $5 a jar. And if you grow your own fruit? Then the jam is nearly free.
But there's more to it than just money. Knowing exactly what's in your food is so empowering. Fruit, pectin, lemon juice, and a little sugar and/or xylitol. You probably can't find that in the store.
Jam is fun. It's the best way to introduce yourself to canning, because it's quick, easy, and almost fool-proof. Of course, the problem with traditional jam is that you literally use more sugar than fruit. When I told my mother-in-law that, she said, "Next time you make me jam, just use less sugar," but it's not that easy. Jam and jelly making is an exact science. You have to have the right amount of acidity so it gets properly preserved, the right amount of fruit and pectin, and the exact amount of sugar or else you don't get a proper jell. If I just left out some of the sugar in a traditional jam recipe, chances are it would turn out pretty badly.
The good news is that they make low- or no-sugar needed pectin these days, that will jell nicely without the need for large quantities of sugar. Here's two very good brands to try out:

Both brands of pectin come with their own instructions. Always follow the instructions on the pectin you're using! This walkthrough is here just to show you what you need before you start and the basic steps taken in jam making so you can see how easy it is.
So let's get started!
The first step you should take is to buy any items you need for canning. Fruit, of course, is an important ingredient. You'll also need 8 oz jelly jars, metal lids and bands for the jars, pectin, a jar lifter, a ladle, a wooden spoon, a large pot to cook the jam, a water bath canner to can the jars of jam (a large stock pot will work well, too, as long as you have 1 inch of water above the tops of the jars), and a rack to put at the bottom of the canner (if you're using a stock pot, you can make your own rack out of extra jar bands).
Those are the essential items you need. There are some nonessential things that just make the job easier. Those include a lid wand, a jar measure, a canning funnel, a small pot to boil the lids in, and a good potato masher.
Don't feel overwhelmed by that long list of stuff you need. Most kitchens already have everything needed, and the things you don't have are very inexpensive, and can generally be found in Walmart, Kmart, and most hardware stores (I don't really understand why, but hardware stores usually have the best selection of canning supplies).
You should decide before hand how much jam you want to make. The kind of pectin I used (Ball Low or No-Sugar Needed) said you should never make more than 10 jars of jam at once, or the jam may not set a proper jell. I've actually experienced this before; it's not very fun to have your hard work turn out runny. Here's the recipe on the Ball pectin:
For 2 (8 oz) half pints of jam, you will need:
2 cups prepared fruit (usually crushed or finely chopped)
1/3 cup unsweetened fruit juice, thawed fruit juice concentrate, or water
3 tsp bottled* lemon juice (use only with blueberries, peaches, and sweet cherries)
1-1/2 tbsp Ball No Sugar Needed Pectin
*Never use fresh lemon juice, even though it tastes better. The reason? You need a certain level of acidity, or you risk harboring really nasty bacteria in your jam. Bottled lemon juice is the same acidity all the time, but fresh lemon juice varies a lot.
For my blueberry jam, I decided I wanted to make six 8oz jars of jam. That means I needed 6 cups of crush fruit. Ball has a decent produce buying guide PDF that gives you the amount of prepared fruit you get per pound. My suggestion is to always buy extra, though, because it's better to have too much than too little.
Since I needed 6 cups of prepared fruit, that means I needed to buy about 3.5 pounds of fruit. I ended up buying 4.5 pounds, and had 12 oz left when I was done.
You don't have to be so scientific about it, either. With the peaches, I just started with a huge box of peaches and peeled and chopped them until I had 8 cups of fruit (to make 8 jars). Then I froze the leftover peaches to make peach applesauce later in the year.
(Confused yet?)
Alright. So now you have the fruit. You have the jars, lids, bands, canner, and everything else you need to start canning. Let's get canning!
The first thing you want to do is wash the jars, lids, and bands. The easiest way to can is to stick your jars in the dishwasher and put it through a full cycle. This gives you enough time to prepare everything and get everything set up, and it fully sanitizes the jars and keeps them hot for when you fill them with jam.
You don't need a dishwasher, of course, and you should hand wash the bands and lids anyway. If you don't have a dishwasher, that just means you have to hand wash the jars and follow an extra step later.
Once the jars are in the dishwasher, the next thing I do is I start cleaning.

My kitchen is usually a mess, but I can only can when the kitchen is spotless.

Canning is a very messy job, and dishes start stacking up quickly, so if your sink is already full, you'll run out of room in no time. So it's better to start off clean.
Next, lay out your supplies.

My kitchen is small, but I'm grateful for the small counter next to the stove. If you don't have a piece of counter next to your stove, setting up a table nearby to hold your supplies might be helpful.

I use three pots in my operation: water bath canner (black pot on the right), large pot to make the jam in (bottom left), and very small pot to boil the lids in (top left). Only the first two are really necessary.

I always lay down large rags on my counter before canning. It makes the clean up easier, and also, the counter is a butcher block and dark fruit stains it pretty easily. It's helpful to get all your tools out before hand, so you're not scrambling around looking for them later. Pictured are (from left to right) several rags, jar bands, jar lifter, jar measure, canning funnel, lid lifter, wooden spoon with a spoon rest, ladle, and extra jar for measuring water depth in the water bath canner.
I usually have a little time between setting up and needing to start the canning process. This is a perfect time to figure out how much of each ingredient you need. Since I was making 6 cups of jam, according to the recipe above, I would need 6 cups fruit, 1 cup water, 3 tbsp lemon juice, and 4.5 tbsp pectin. It also helps to measure it out before hand so it's ready when you need it.

When there's about 45 minutes left on the dishwasher, that's when I start working. First, I fill up the water bath canner. It's easiest to put it on the burner you want and use another pot to bring water to it. When it's full, it's very heavy. Use the extra jar to determine how much water you need. When all the jars are in the canner, there needs to be 1 inch of water above the tops of the jars. I usually fill the canner up until it reaches the edge of my extra jar, because the filled jars will displace more water and usually bring it up to the level needed. You don't want too much water, or it'll take forever to boil. If you have hard water like I do, add about 1/2 cup distilled white vinegar to the water to keep it from leaving white deposits on your jars.
Once full, put the lid on the canner and turn the heat on to HIGH. By the time the dishwasher is done and the jam is ready, the canner should be at a full boil.
If you don't have a dishwasher, there is an extra step you need to take at this point. Put the rack in the bottom of the canner and add the empty jars. When you're jam making with a water bath canner, your jars do not need to be sanitized, but they do need to be very hot when you add hot jam to them or you risk damaging the glass. I've never had a problem with using cold jars in the past, but these days, I'd rather play it safe.
Next, it's time to wash and prepare the fruit. This can take different amounts of time depending on what kind of fruit you're preparing.

Blueberries were pretty easy. The part that takes the most time is sorting out the bad ones and any stems.

The peaches, on the other hand, took forever. Peaches are involved; you have to remove the pits, then dip them in boiling water to remove the skins, and then finely chop them. I think it took me two hours to fully process all the peaches, and my hands were in agony by the time I finished. Which I think is why I like working with berries better.

With berries, you always crush them. You can use a fork or a wooden spoon, but the easiest way is with a potato masher. Never put them through a food processor or the consistency isn't right. You end up with more of a berry butter instead of a jam. And it's easiest to crush them one layer at a time. This way you know that every berry is being crushed.
After crushing each layer, pour it into a measuring cup so you can keep track of how much processed fruit you have.

I like to put the lemon juice in the pot, so that every time I fill up my measuring cup, I can empty the fruit into the pot and mix it with the lemon juice. That way, the lemon juice keeps the fruit from browning while I prepare the rest of it.

When there's about 10-20 minutes left on the dishwasher, I like to get the jam started. First, I put my lids in the small pot and turn the burner on to medium low. The water doesn't need to boil, it just needs to get hot. The point is to soften the sealant on the lids so they create a better seal when you put them on the jars. If you don't have room for a third pot, you can also put the lids in a large glass bowl and add boiling water to them. By the time the jam is done, the sealant should be softened.
Now it's time to get jammin'. Slowly add the pectin to the fruit, water, and lemon juice mixture, making sure to stir it in well.

Once incorporated, turn the heat on to HIGH, and start stirring! This process takes a while, but you need to be there to make sure the fruit doesn't scorch.

So keep stirring! Eventually, you may notice the fruit is getting more syrupy.

And darker.

That's my spoon rest. The juice on the left is from when I started, and the fruit on the right is from right before it started boiling.
Keep stirring and heating the fruit until it comes to a full rolling boil. This is important. A full rolling boil is a boil that you cannot stir down with your spoon. You may see bubbles when you stop stirring, but if you can stir them down, it's not ready yet.
Usually for me, I can tell it's about to boil when I start seeing some foam around the edges of the fruit.

Once you reach a full rolling boil, this is the time to add any sugar you want in it. I know you don't want sugar; neither do I, but for most fruit, you need a little bit to make it taste good. DO NOT add artificial sweeteners; they don't stand up to the high heat of the canning process. Some people say they've had success with Splenda, and some people have had good results with stevia. However, the only sweeteners I would recommend are sugar, xylitol, and erythritol.
I always start out with a 1/2 cup of sugar. Add it to your jam, stir it in well, and then taste it.

It's best to put a little bit on the spoon rest and get a little on your finger in order to taste it. Putting a spoon directly into the pot and then directly into your mouth is a good way to burn yourself.
If it tastes too sour, another 1/2 cup of sugar. But honestly, 1 cup of sugar would be my limit. Remember that you're not trying to recreate the jam you buy in the store; you're trying to make something that's fresher, more fruity, less sugar-bomby. The recipe also says you can use fruit juice instead of water, to naturally sweeten your jam if you so desire. I plan on trying it sometime to see how it works.
For my blueberry jam, I added 1/2 cup of sugar and 1/2 cup of xylitol.
Once you have the sweetness to your liking, it's time to start stirring again. The goal is to bring it up to a full rolling boil again, which shouldn't take as long as last time. Remember to watch for the foam starting to foam around the edges, and don't stop stirring until you can't stir the bubbles down anymore.
Once you reach a full rolling boil, set a kitchen clock to 1 minute, and stop stirring. Let it fully boil on it's own for exactly 1 minute.

After the minute is up, turn the heat off for the jam. Let it rest for a minute or so, and if you see any foam on top, skim it off (save the foam, though; it's still delicious, it's just not good for the canning process). I don't usually get much foam with my low sugar jam though, thankfully.
The jam is done now. Technically, you could stop right here if you wanted to. You could store the jam in the refrigerator, or in the freezer with proper containers. The problem is that this jam doesn't have any preservatives, so it will only last about a week in the fridge, and if you make a large batch, it will take up a lot of room in the freezer. That's why water bath canning is awesome. You can can it and it will be shelf stable for 1 year.
Now it's time to fill the jars. Always work with only one jar at a time. If you have a dishwasher, get out one jar and then close the dishwasher again to keep the heat in.

If you don't have a dishwasher and you put your jars in the canner, remove one jar at a time with your jar lifter and then return the lid.
If you have a water bath canner with a canning rack, at this point you should raise the rack up so that it's attached to the sides of the canner and the bottom is near the top of the water. That's confusing. The only picture I have is near the end of the process.

As you fill each jar, you'll put it on th. rack and then put the lid back on. This way, the jars stay warm as you work, and by not being in the water, the fruit won't get over cooked. If you have empty jars in the canner because you don't have a dishwasher, don't worry; they'll stay warm enough until you need them as long as the lid is on the pot.
Ok, now, time to fill those jars. Start by putting the canning funnel into your jar if you have one. This cuts down on a lot of mess.

Now ladle jam into the jar. For jam, you want to fill it up to within 1/4 of an inch from the top. That's where the jar measure comes in handy.

Now wipe the rim of the jar with a damp rag. Make sure it's squeaky clean, or you may not get a proper seal.

Lift a lid out of the hot water and put it on top of the jar, then add a band over top of that. The band should be finger tip tight on the jar. I'm not sure what that means exactly, so I usually take it literally by tightening only as tight as my finger tips can tighten it. Don't over tighten the band, or the jar may not vent properly while it's in the canner (it needs to release oxygen from the jar as it boils so that it seals properly).
Now lift the jar with your jar lifter and put it on the rack.


Continue working until all the jars are filled. If you have left over jam, but not enough to completely fill another jar, you can stick it in the fridge and it will keep well for a week or so.
Once the canner is full, carefully lower the rack into the water. Make sure to stand up any jars that may have fallen over. Put the lid back on and wait for it to begin boiling again. It usually only takes a couple of minutes for me. You'll know it's boiling when a little steam is escaping from the lid. You can safely take quick peeks once in a while without ruining the boil. Once it's fully boiling again, start a kitchen timer for 10 minutes.
If you live at higher altitudes, you'll need to adjust that time a little bit. Here's a chart for adjusting the time. So for where I live, I need to add 5 minutes to the processing time, and set my timer for 15 minutes.
At this point, it's a good time to clean up a little. I like to throw all the sticky utensils into the jam pot and fill it with hot soapy water.

If you get it when it's fresh, jam is easy to clean. If you let it dry out, it can be a pain in the butt.
When your timer beeps, turn the heat off from under your canner. Take the lid off, and set the timer for another 5 minutes. This is to let the cans cool a little bit before removing them from the water.
When the timer goes off again, remove each jar from the canner and put it on a towel in a nondrafty area. Don't tilt the jar, even to remove the water on top. You may ruin the seal if you do that.

Yes, I did two batches of jam that day; one low sugar for me, and one half sugar for my mother-in-law. She loves jam, so I make it for her once in a while. But when she found out that it's mostly sugar, she told me to make it with low sugar like I make for myself. Well, I know my MIL well. She's a carbaholic. I sent her over some of my low sugar jam to try first, and as predicted, she said it was too tart. So we decided the best option for her was a recipe that uses about half as much sugar as a normal recipe would. She hasn't tried it yet, but I'm sure she'll like it.
Once the jam is all done, let it sit in a nondrafty area for 24 hours before moving it. If you're using metal lids, check each one for a seal by pressing the top. If it flexes inward, it isn't sealed and should be refrigerated. If it doesn't move any when you press it, congrats! You have a sealed jar of jam.
At this point, you can remove the bands if you want (they tend to rust if you leave them on) and store the jars in a cool, dark place. They will stay good for 1 year, but usually can still be eaten after that point. Just make sure to smell every jar after you open it. If it smells yucky or sour, throw it away.
So what do I use my jam for? I don't eat bread anymore (except the occasional coconut biscuit), so what could I put it on? Well, one of my favorite ways to use it is in plain full fat yogurt.

And when I get ambitious and make coconut pancakes, we use jam instead of syrup.

(Yes, that's a hamburger. With my pancakes. It was delicious.)
I think that concludes my jammin' post. Did I cover everything? I sure hope so, 'cause this post took forever to write! Making jam isn't very hard. If you do it in summer, when fruit is plentiful and cheap, it can really save you a lot of money. I think it cost me about $1 a jar for the blueberry jam, whereas if you buy sugar free jam in the store, it can cost upwards of $5 a jar. And if you grow your own fruit? Then the jam is nearly free.
But there's more to it than just money. Knowing exactly what's in your food is so empowering. Fruit, pectin, lemon juice, and a little sugar and/or xylitol. You probably can't find that in the store.
Subscribe to:
Posts (Atom)